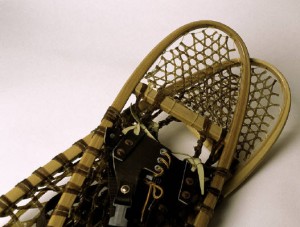
Winter can be tough on those who enjoy daily runs or walks on sidewalks and roads as ice and snow can be treacherous. A safer and fun alternative is snowshoeing. With this super-size foot gear strapped on your feet, you can burn gobs of calories tramping through the woods or have an easier workout walking on packed trails. (Avoid groomed cross country ski trails since snowshoes destroy the ski tracks.) Since winter, at the minimum, delivers us five months of snow, procuring a pair of snowshoes is a good investment.
Locally, snowshoes are available at our big box sporting goods stores and McClain’s Cycle Shop. However, when faced with a wall display of snowshoes, making a selection can become confusing. Here are some guidelines to help you make the right purchase:
1. Size matters. To keep from sinking into the snow, bigger people need larger snowshoes. The four most common sizes each have a suitable weight range: 8” X 21” (women’s) 80-150 lbs., 8” X 25” for 120-200 lbs., 9“ X 30” for 170-250 lbs., and 10” X 36” for 220-300 lbs. If you will be carrying a pack or equipment, figure that additional weight into your choice. If you will be walking in a foot or more of powder, a larger shoe may also be helpful.
2. Hinges – When you take a step your heel should rise off the snowshoe and your toe drop. This keeps you from having to lift the entire snowshoe off the ground when you go forward. If your foot can make this natural motion with little resistance, it is also easier to walk. Check to see if the foot bed of the snowshoe moves easily up and down.
3. Binding – Your foot should be securely fastened into the binding so there is little, if any, side-to-side movement. The binding should be easy to operate since you may be adjusting or putting on snowshoes outside in the bitter cold. Kids always seem to need help with their snowshoes, so if you are involved in the purchase of snowshoes for them, check out the bindings.
4. Decking – The flat platform area needs to be a strong fabric that won’t easily puncture or tear. Nylon or neoprene is recommended. Be sure that the fabric that wraps around the tubing on the bottom of the shoe is reinforced, preferably with a layer of plastic, since walking on pavement, ice, or rock wears on this area.
5. Crampons – If you will be climbing hills or walking on ice, you should have crampons or metal cleats on the bottom for grip. Most snowshoes have these, but it is worthwhile to check.
6. Metal or wood – Almost all new snowshoes are made of aluminum, titanium, or steel. Titanium is lighter and stronger but is expensive.
Until the late 1980s, all snowshoes were wooden. Although the traditional wood snowshoes had rawhide webbing, most now have neoprene. Wooden snowshoes are quieter than metal shoes and do not sink into the snow as much as metal. I have a pair of 10” X 32” Iversons and, although I race in metal shoes and wear them occasionally, most of my snowshoeing is done wearing a wood pair. Iverson Snowshoes are manufactured in Shingleton, Michigan. Check out their website for more information.
7. Price – Expect to pay $100 – $200 for metal shoes. Lighter weight snowshoes cost more as do those with better quality decking. Whereas cheaper snowshoes will be adequate for walking in more urban settings, if your snowshoeing will be in the backcountry, where an equipment failure could be problematic, you may want to invest in better quality gear.
The development of the metal snowshoe was a period of trial and error. The early models had bindings that were ineffective and hard to adjust. For a time bindings were made of rubber and these were a failure as the foot swiveled as one walked. Some designs had decking that ripped or was easily punctured. If buying used snowshoes be sure to check them over carefully. Now most snowshoes, especially those from established companies like Tubbs, Atlas, and Red Feather, are high quality.

 124 ½ N Mitchell Suite 115
Cadillac, MI 49601
(231) 775-3631